iOS
Requirements
- .NET 7 (latest)
- Xamarin (iOS)
- A Mac with Xcode 15 installed
Apple Developer Account Setup
-
Accept your invite to the Bitwarden Apple Developer team. You should get a request in your email with the subject "You're invited to join a development team." Click the link, "Accept Invitation" and you'll be prompted to create an Apple ID for your Bitwarden email address. If you didn't receive this email, contact the IT department (@IT in slack). Accept the terms and conditions and complete the sign up flow
-
Go to Apple ID Online and log in with your new Apple ID. Set up 2-factor authentication (using mobile phone and/or trusted device) - this is critical because Apple no longer allows "developer" accounts without MFA, but it won't tell you that when your build fails locally
-
Go to App Store Connect and accept the terms and conditions
-
Ensure you have access to the Bitwarden team and team app profiles
-
Go to Apple Developer Account and go to the "Certificates, IDs & Profiles" menu item. Check that you can see the 8bit Solutions LLC Certificates in the Certificates section, and the Bitwarden profiles in the Profiles section. If any of this is missing, ask the IT department (@IT #tech-support in slack) for the additional roles / permissions
MacOS Setup
Next, you need to get your Mac environment set up for building and running the Bitwarden iOS mobile project. This requires creating the necessary developer provisioning profiles for code signing and execution on your Mac through Xcode. Visual Studio has a simple process to get all of the provisioning profiles, however this is prone to fail without much feedback. Try the Visual Studio instructions ("The Easy Way") first, and fallback to the Xcode instructions (“The Hard Way”) if required.
Visual Studio: The Easy Way
-
Open Visual Studio for Mac
-
Go to Preferences > Publishing > Apple Developer Accounts
-
Click “Add”, choose "Enterprise Account", and sign in with your previously configured Apple Developer account
noteIf you receive a "Failed to synchronize with Apple Developer Portal" error, you’re missing additional roles / permissions.
After signing in successfully, you should see your account in the list and “Bitwarden Inc” in the account teams list
-
Click “View Details…”
-
If you don’t have a valid Apple Development certificate, click Create certificate > Apple Development
-
Click “Download All Profiles”
-
You should now be able to run the app by setting
iOS > Debug | iPhone Simulator > [pick any iOS Simulator]in the top left corner and pressing Play
If this worked, you can skip the next section.
If you only have the option "Generic Simulator", with a message to lower the 'Deployment Target', your version of Xamarin may not yet support the version of Xcode that you are using (as discussed here).

To work around this issue, try downloading and installing an older version of Xcode from Apple (you can look for guidance on which Xcode version to use from the Xamarin.iOS release notes. After installing the new version of Xcode, restart Visual Studio and load your project to verify your available simulator options.
If you need multiple versions of Xcode installed on your development machine, you can rename the
Xcode.app file extracted from your download to something else (e.g. "Xcode_14_2.app") before
placing it in your Applications folder. You can then switch between Xcode versions by using
xcode-select from the command line. e.g.:
sudo xcode-select -s /Applications/Xcode_14_2.app
You may achieve similar results with tooling such as Xcodes.app
Xcode: The Hard Way
If you're the next person to follow these instructions, please commit and upload the Xcode project files you create so we can streamline this process.
Only try these instructions if the Visual Studio instructions above didn't work for you.
-
Open Xcode
-
Accept any defaults, ensure any extensions/add-ons have been installed, etc.
-
Create new project... > iOS > App
-
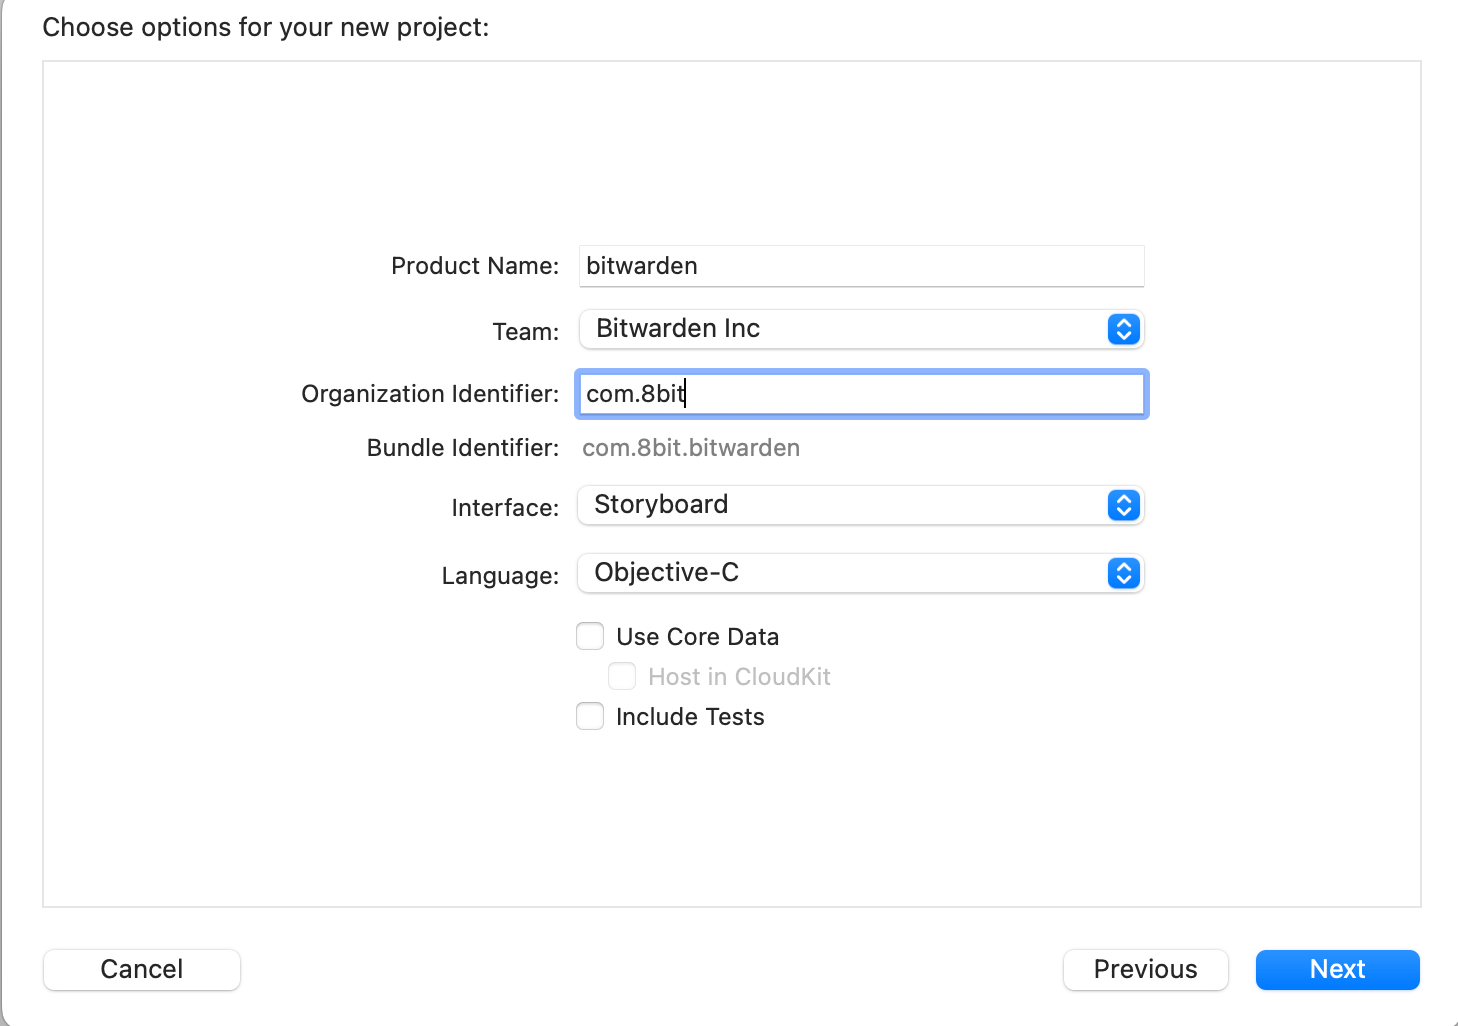
Use the following options for your new project:
-
Product Name: "bitwarden"
-
Team: Bitwarden Inc (if this is missing, double check your Apple Developer Account setup above)
-
Organization Identifier: "com.8bit"
-
Bundle Identifier (automatically generated): "com.8bit.bitwarden"
-
Language: Objective-C
-
User Interface: Storyboard
-
Leave all other checkboxes unchecked (or uncheck them)
-
-
Click Next, save to the default location and then click "Create"
-
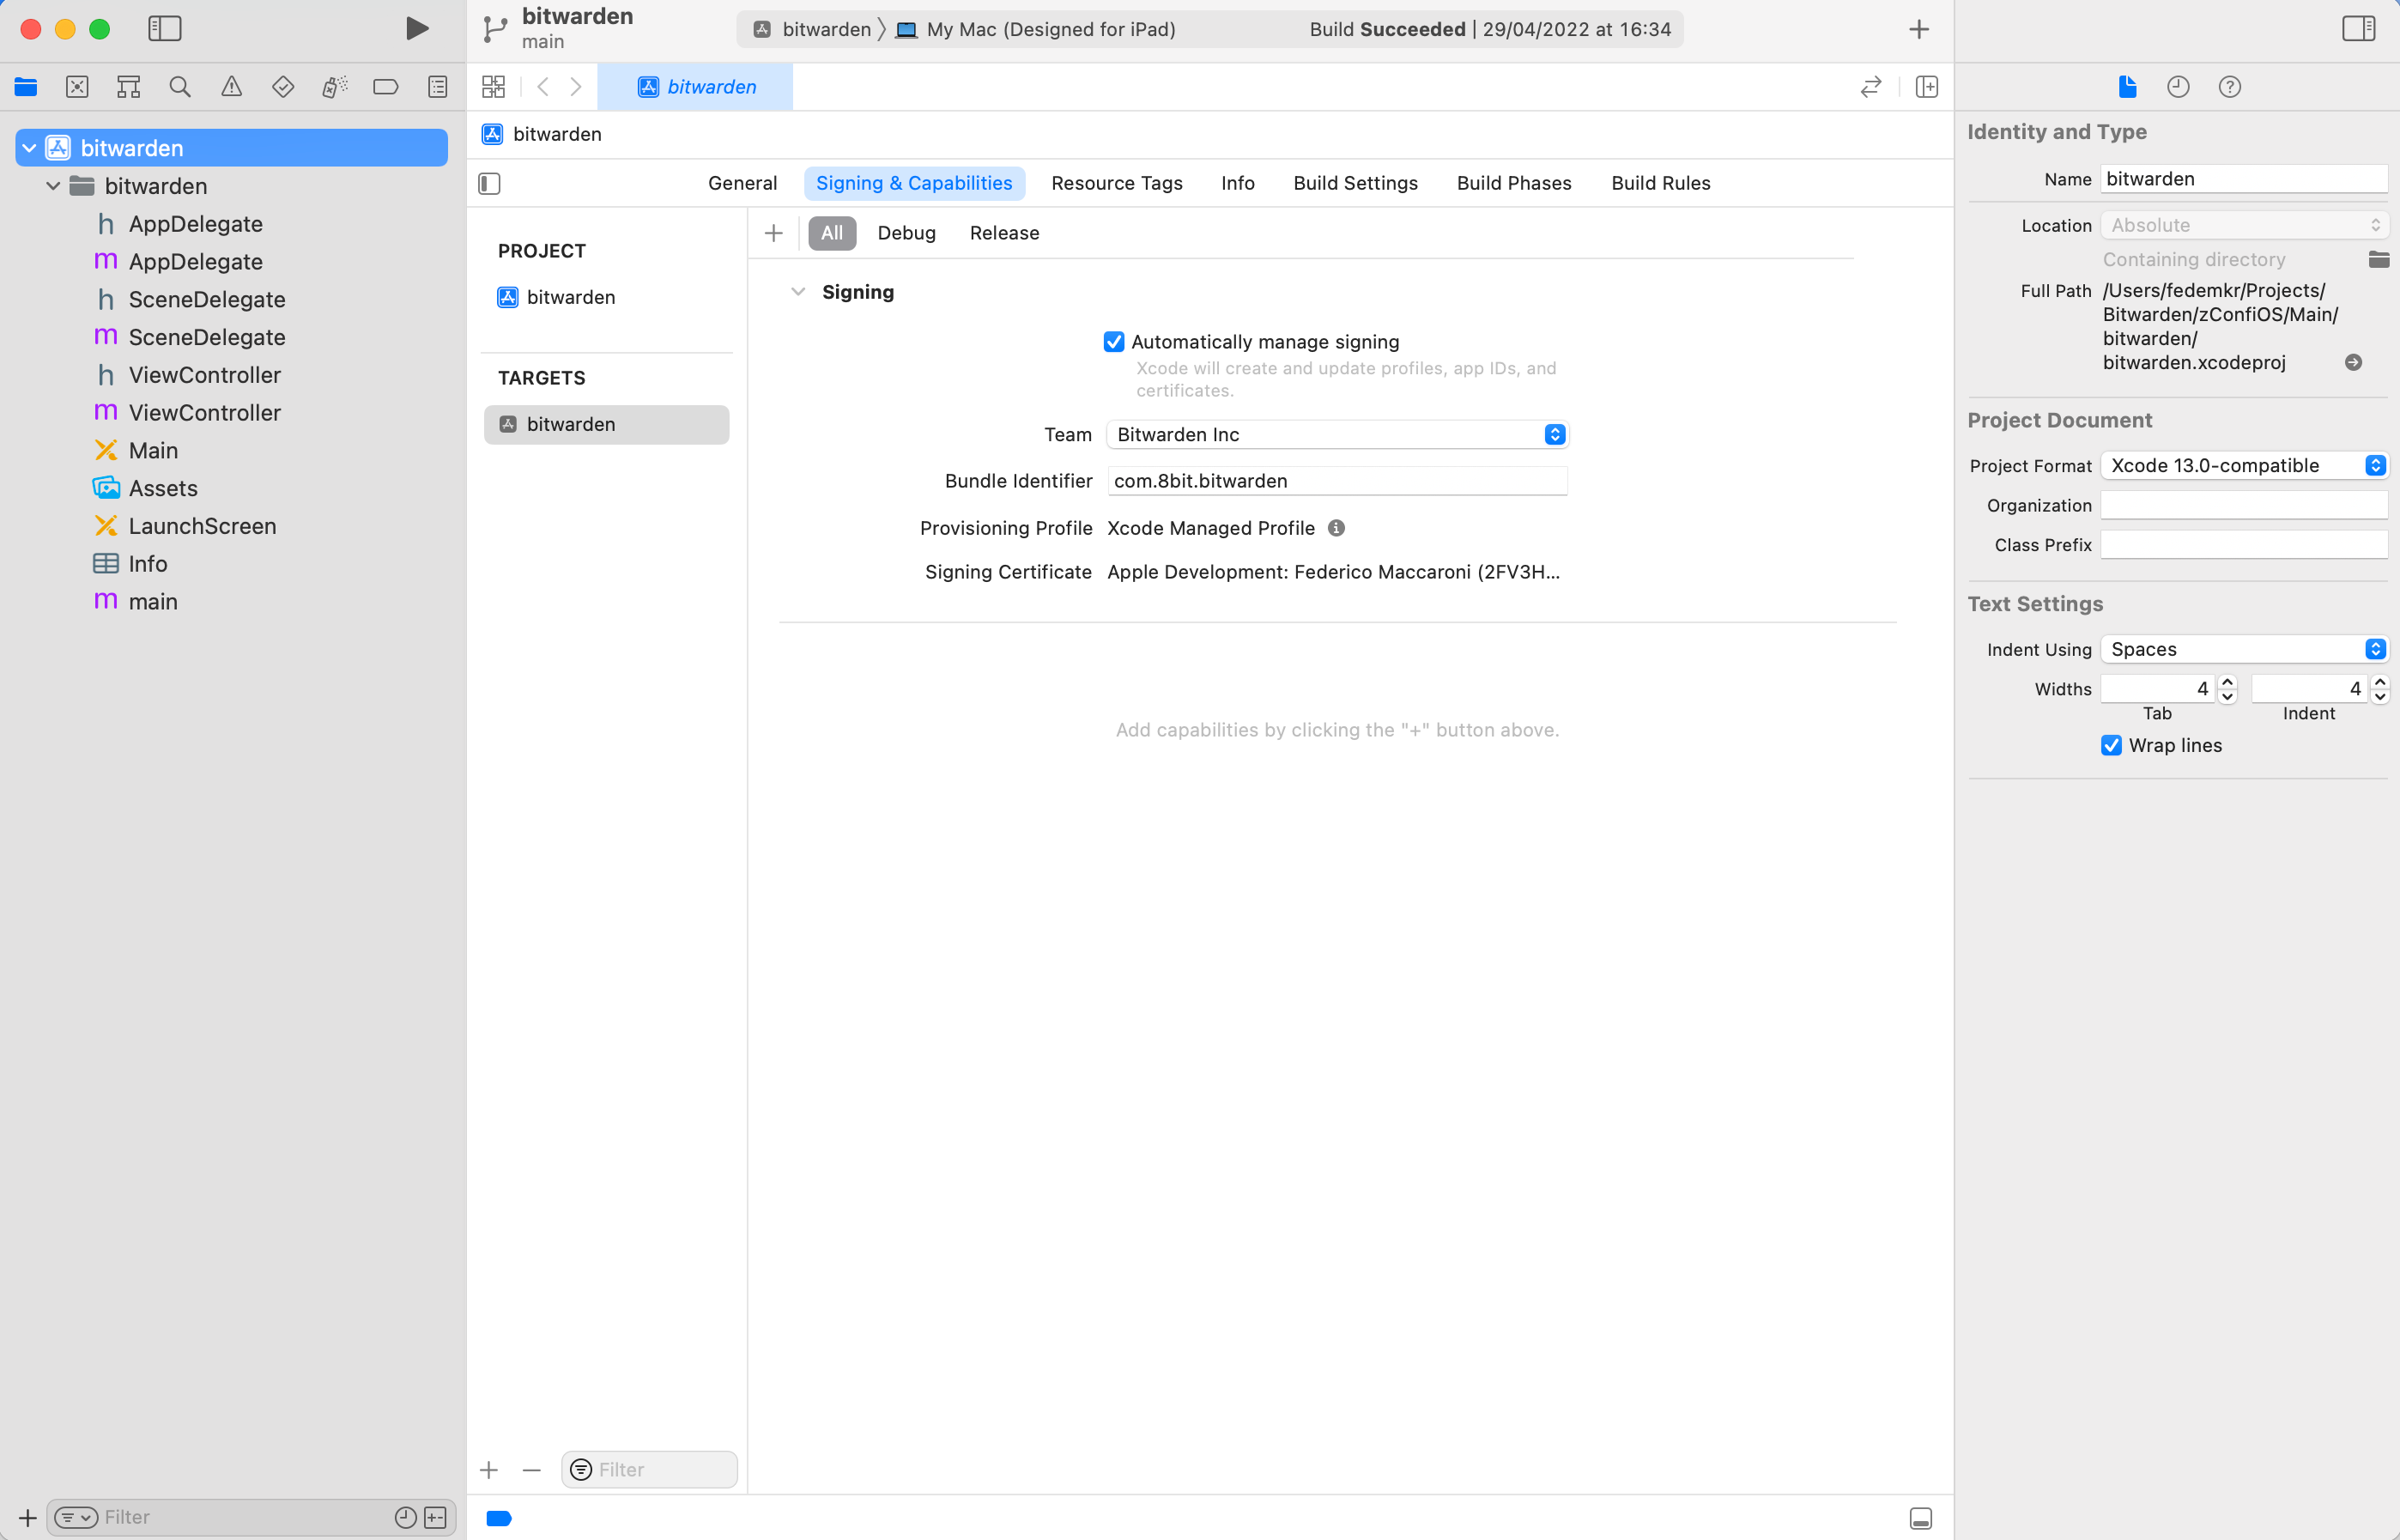
On the project configuration page, click the "Signing & Capabilities" tab
-
Make sure you have the following defaults:
-
Automatically manage signing: (checked)
-
Team: Bitwarden Inc
-
Provisioning Profile: Xcode Managed Profile
-
Signing Certificate: your Apple ID/Name
-
-
From the menu bar, click Product > Build
-
Repeat Steps 3-8, with the following changes in step 4:
-
Product Name: "find-login-action-extension"
-
Organization Identifier: "com.8bit.bitwarden"
-
Bundle Identifier (automatically generated): "com.8bit.bitwarden.find-login-action-extension"
-
-
Repeat Steps 3-8, with the following changes in step 4:
-
Product Name: "autofill"
-
Organization Identifier: "com.8bit.bitwarden"
-
Bundle Identifier (automatically generated): "com.8bit.bitwarden.autofill"
-
-
Repeat Steps 3-8, with the following changes in step 4:
-
Product Name: "share-extension"
-
Organization Identifier: "com.8bit.bitwarden"
-
Bundle Identifier (automatically generated): "com.8bit.bitwarden.share-extension"
-
-
If you have a physical device (e.g. iPhone or iPad) that you want to use for testing, you will also need to do the following for each of the Xcode projects you just created:
-
connect the device with a cable
-
select your device as as the build target in Xcode
-
from the menu bar, click Product > Build
-
agree to register your device if asked
noteSometimes these profiles can mess up. If you have issues running on your physical device (or simulator) try running
rm -r ~/Library/MobileDevice/Provisioning\ Profilesto clear them out. Build each Xcode project again to regenerate them. -
Visual Studio
Next, we need to configure your Visual Studio environment for development.
- Windows
- macOS
-
Connect to the Mac that you just completed the above steps on
-
Open Visual Studio and click Tools > iOS > Pair to Mac
-
Scan for and select your machine. If you don't see it, click the "Add Mac..." button and put in the Mac name or IP address. If you don't know your Mac name (or you're in a Windows VM on your Mac), go to your Mac and open System Preferences > Sharing and look for the ".local" address of your machine
-
Provide your Username and Password for MacOS when prompted
-
Once paired, close the Pair Mac window
-
Change your active build profile to Debug > iPhoneSimulator > iOS
-
Rebuild the iOS project from Solution Explorer
-
You can now debug using the iOS Simulator
-
Check that command line tools are installed:
-
Open Xcode
-
From the menu bar, click Xcode > Preferences > Locations
-
Make sure an Xcode version is selected under "Command Line Tools"
-
-
Open Visual Studio for Mac
-
Open the mobile solution file (
bitwarden-mobile.sln) in the root of your local mobile repository -
In the top bar, you should be able to select iOS > iPhoneSimulator > select your model and click run (or your physical device if you set one up)
Debugging
iPhone Simulator
The iPhone Simulator has access to localhost and you can point the client at your local dev server as usual. However, the app will require https by default. To allow http for testing purposes, follow these steps.
-
Open
src/iOS/Info.plistin Visual Studio Code or another editor so that you can edit the raw XML. (Don't use the Property List Editor in Visual Studio.) -
Add the following code in the top-level
<dict>element:<key>NSAppTransportSecurity</key>
<dict>
<key>NSAllowsArbitraryLoads</key>
<false/>
<key>NSExceptionDomains</key>
<dict>
<key>localhost</key>
<dict>
<key>NSExceptionAllowsInsecureHTTPLoads</key>
<true/>
<key>NSIncludesSubdomains</key>
<true/>
</dict>
</dict>
</dict> -
Save and exit
Info.plist -
Press Command + B to force a new build before launching
-
Don't push these changes :)
iPhone device
The device doesn’t have direct access to your Mac’s localhost, so you can follow this guide to connect them.
After you do that, you’ll have to also modify the Info.plist to allow http for testing purposes as
explained before on the simulator testing.
It’s also highly likely that you need to change the launchSettings.json on Server, on Properties
of each project. There you need to change the applicationUrl of iisSettings -> iisExpress and of
profiles -> Identify so that instead of localhost it says name.local where name is the
computer name you set on Mac’s Sharing config.
Before you actually test on the app, open a browser and try to connect to the Api by going to
http://name.local:4000/alive . If this doesn’t work then review the steps on the guide or the
server configuration. Make sure you have your User secrets up to date as well.
Finally, you’ll have to configure the Api and Identity urls on the phone to use
http://name.local:4000 and http://name.local:33656 where name is the computer name you set on
Mac’s Sharing config.
iOS Extensions
-
Set the iOS Extension project as Startup project
-
Press Run
-
You will receive a popup saying "Waiting for the debugger to connect..."
-
Don’t open the Bitwarden app (otherwise the debugger will connect to it instead of the extension). Instead trigger the extension
-
Your extension breakpoints should now be hit
For example: if you want to debug the iOS.Autofill extension, you would complete steps 1 - 3, then go to your iOS device, open a browser, go to a login, tap the key icon and open Bitwarden from the bottom popup.
Using Server Tunneling
Instead of configuring your device or emulator to ignore SSL certificates, you can instead use a proxy tunnel to your local server and have your app connect to it directly.
Push Notifications (Live Sync & Passwordless)
Push notifications are not currently available for debug deployments. They are only supported on TestFlight and production builds.